Top Note Box Tutorial by Bensarmom
I took my idea from the Butterfly Bag that Allison made here:
http://alliohran.blogspot.com/2009/03/butterfly-bag.html
I wanted to figure out a box size to make since I didn’t have bags.
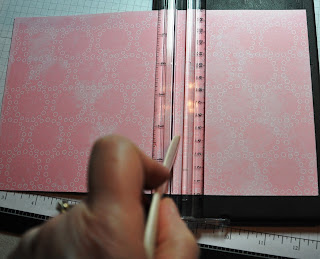
1. Take a 12x12 piece of paper and cut in half.

2. Take one 6x12 piece and cut out your two top note pieces.

3. Take the other 6x12 piece and cut it down to 6x10.
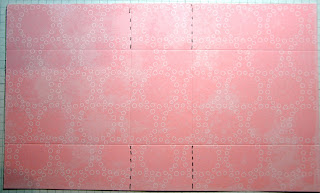
4. On the 10” side score at 4" and 6".

5. On the 6” side score at 1 1/2" and 4 1/2".


6. Fold using your bone folder to draw the scoring lines. The designer paper is thinner and often rips if you push too hard with the scoring blade.

7. Cut on the short sides as shown.

8. Add snail on the short pieces.

9. Attach the back piece to this short piece.

10. Add snail to the long side piece and attach to make the box.


12. Stamp butterfly in amethyst and cut out.


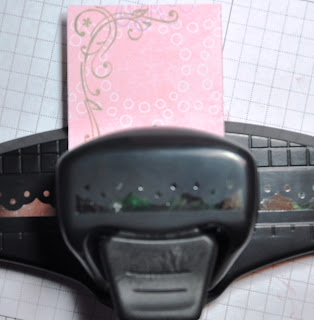
Punch the top two corners with the corner rounder and add amethyst ink to edges if wanted.


13. Punch out branch with Martha Stewart branch punch.

14. Add glue to paper and glue branches and center only of butterfly. (It's wings will be dimensional and raised up.)


15. Add butterfly then pearls.
16. Use dimensionals to attach decorated paper to box front.

18. Attach front and back top note pieces.

20. Put red line tape on each side of the ribbon. Wrap it around the back too.

21. Peel tape backing off and tape ribbon between the box and top note paper.


22. A variation of this would be to pinch the top of the top note box and close the box.

I'm working on a video for this as well. My DS is editing as we speak. We'll see how he does.
Thanks for visiting. Today was a rainy day which was a great time to stamp away in my stamp room.
If you try this let me know if it was easy to follow or not. It's been a while since I did one of these.
Blessings,


No comments:
Post a Comment